As a freelance camera operator / videographer I am fortunate to have experiences working in a wide variety of locations and industries.
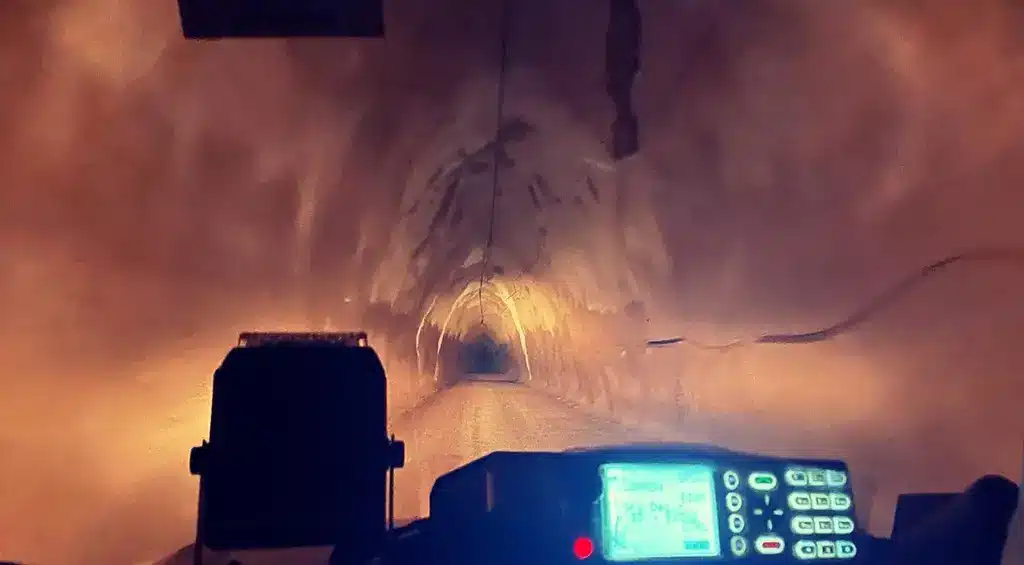
One day you might be filming a corporate interview in a clean office, the next day you might find yourself filming in underground mines, walking through thick mud, a kilometre under the surface.
Variety is the spice of life as they say and it keeps me engaged with my career and loving my job.
For the latter example, filming in an underground mine, it’s a very unique experience that offers it’s own challenges and rewards.
I have shot promotional material, safety videos, interviews and even music videos underground in the past 10 years or so. Every single trip I go on, I learn something new on how to approach the assignment.
In this article I’ll be covering 5 tips on what I’ve learnt so far and how I prepare to go underground from kit selection, camera equipment preparation, pre production and what to expect when you go underground at a mine.
Depending where you are in the world and what mine you are going to, make sure you pay a lot of attention to the elements. If you are someone who tends to feel the cold more than other people, pack for this, pack thermals to wear under the overalls you will likely be supplied.
I have only ever worked underground in Australia and the temperature underground varies drastically depending on how deep underground you are going to and what time of year.
For example, If we are going underground in South Australia in August to a shallow depth (usually where there will be installed ventilation), the air temperature can be quite cold (around 13 – 17 degrees).
If we are going deep underground to locations recently excavated parts of the mine in mid February then I will be prepared to sweat more then I ever have before! It get’s seriously hot and humid down there!
Packing water in your camera bag as well as snacks is highly recommended as you do not necessarily know when you’ll be in a position to have lunch or a snack break.
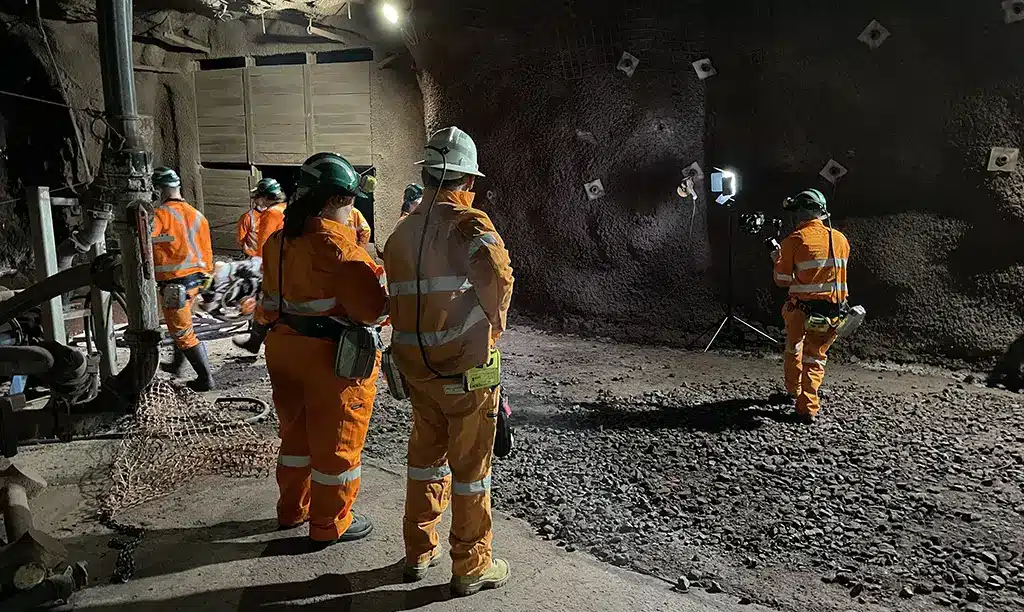
All of your PPE (personal protective equipment) is generally provided for you before you go underground but some items I recommend packing are:
Sunscreen – especially in summer in the desert
Large bin bags – stuff them in your camera bag. I’ll explain why further down in this article
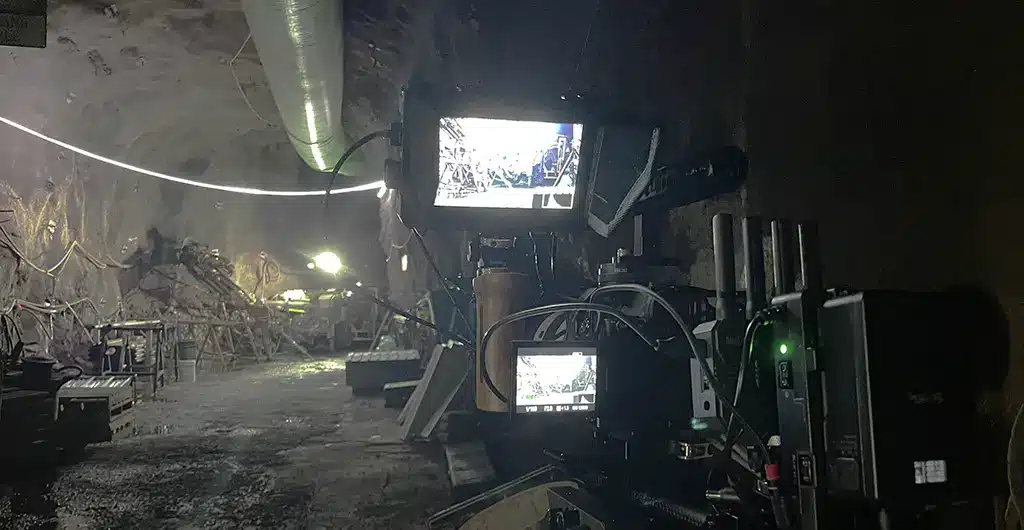
The conditions underground can certainly put production equipment to the test. Depending on the type of mine (copper, coal, gold etc), there can be very fine dust in the air.
This fine dust can cause havoc with electronics and my main piece of advice with camera selection is to take a camera that isn’t running an internal fan or has an option to temporary disable the fan as this can suck in the dusty air and cause issues further down the track.
A few years ago, I shot some content underground with a Sony FS7 which was my main camera at the time. With the internal fans sucking in that fine dust all day I knew that it wasn’t a good idea.
I eventually had the camera serviced and the technician did mention that there was quite a bit of orange dust build up on the fan. There are only a few places in the world where dust is bright orange!
A decent on board monitor is crucial for the A7S3
In early 2023, on my next project underground I decided to leave the Sony FX6 camera in the office and instead build a rig on the Sony A7S3 camera. The A7S3 offers somewhat more weather sealing is a safer bet to combat the conditions underground.
It actually performed very well, the low light capabilities created fantastic pictures in the dark environment underground with minimal need for lighting each scene.
Another thing to consider is lens choices. Fast zoom lenses are what I tend to pick when preparing to go underground. My go to options are the 24-70mm f2.8 and the 70-200 f2.8. These two lenses provide a good range whilst staying fast for that low light. Changing lenses exposes the sensor to contaminants which you need to reduce as much as possible.
For supplementary equipment such as gimbals, monitors, and lighting, keep in mind that you’re probably going to spend at least half a day cleaning them after the shoot. I always budget professional cleaning of the equipment after the shoot.
If you use an Easyrig, bear in mind that it might be difficult to wear due to the various emergency gear you will have to wear on your belt such as respirators, lamp batteries etc.
I did take my Easyrig underground once but never wore it. There was not enough space for the waist belt to fit.
One of the most important pieces of kit to consider is battery power. For the Sony A7S3 rig I created I made sure I can run the battery off the standard Sony batteries as well as the v-mount battery in a pinch. That way I was able to minimise changing batteries as well as not having to worry about battery management when we were underground.
Tip:
Take a few large bin bags in your camera bag when you go underground. These can be used to protect the camera when it’s in the (usually) dirty mining truck.
Putting gaff tape on the feet of your tripod will also protect them from thick mud when underground.
Parework and insurance
Before entering the the mine boundary, make sure you double check that your public liability, personal injury and any other freelance videographer insurance you may have.
This is especially important if you’re planning on flying a drone close to the mine. A lot of standard drone flight public liability insurance does not cover you when flying within air space that is above a commercial mine.
Keeping in mind that there is usually a considerable amount of per production clearances and inductions that you will need to complete before the shoot. I normally budget at least 1 hour of ‘paperwork’ pre production for each shoot.
Ask in advance
Filming in an underground mine
Building on what I mentioned above, make sure you ask questions in advance before prepping your gear.
Questions such as how deep underground you are going will give you an idea on the conditions you are likely going to be working in. Some other questions to ask would be:
Will be be filming in a new or old part of the mine?
Will there be spare seats in the mine truck for gear?
Is PPE provided?
How long will we be underground? (Think food and water)
Enjoy the experience
Enjoy the experience!
Filming underground in a mine is physical and often stressful work! But it’s important to live in the moment and enjoy the experience.
You will be entering a very unique environment that fascinates me every time I film underground.
There is just something about physically touching the rock face almost a kilometre under the earth’s surface wondering when the last time this rock was on the surface.
I hope this article has helped you gain an insight as to what to expect when it comes to working underground for the video production industry.
As a freelance camera operator / DOP, if you get the offer to film underground my advice would be to absolutely go for it, but make sure you are prepared!
Updated D.O.P production kit - Sony FX6 in Adelaide
Every year since I first went freelance in 2011 I have kept up with new technology in the industry, the first camera I bought 12 years ago was the Sony A77 – really a nice little DSLR at the time, coming off the back of the Canon 5D revolution in the industry circa. 2010.
In 2013 my A camera was the Sony FS700 which brought HD slow motion to the forefront capable of shooting up to 240fps – very impressive at the time!
In 2018 I sold the FS700 and bought the FS7 which is still my C camera to this day. It still holds up for a third camera in well lit interviews or for locked off third camera shoots.
In 2020 The A7S3 became my gimbal / A camera / B camera that I used to work in conjunction with the Sony FS7. The A7S3 quickly became my favourite tool to use – It’s nimble, a low light powerhouse, light enough to run on the gimbal and offers 4k 10-bit S-Log3 at up to 100fps.
Since the start of 2023 I have invested significantly into additional camera kit to continue to offer a range of options for producers and clients alike.
Below is a round up of all of the new kit that’s been added to my full kit which is included in my day rate in Adelaide and Australia wide.
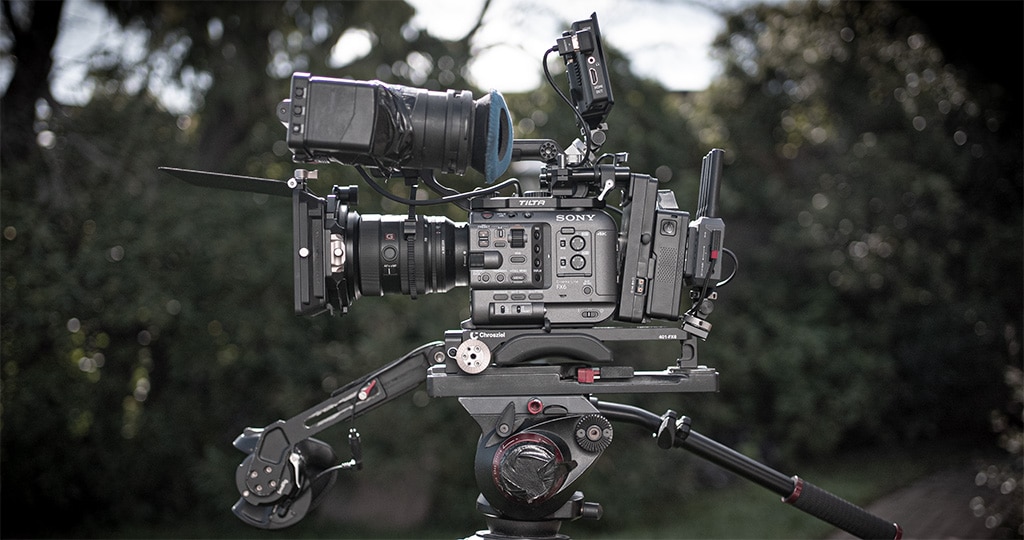
This Sony FX6 cine camera that has now become my A camera included in my day rate.
I have used this Sony FX6 in Adelaide on a few shoots in the past couple of months and I have been genuinely so impressed by what this camera is capable of! The high base ISO for low light conditions is incredible!
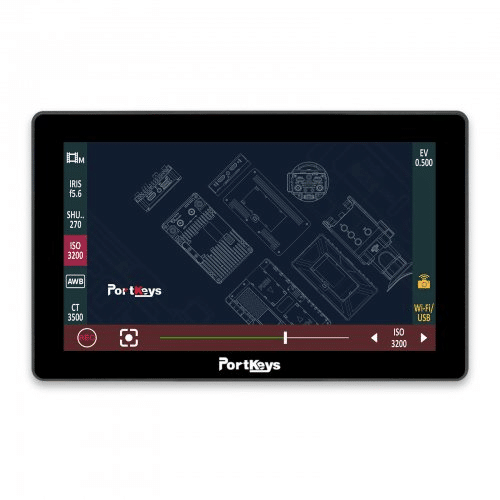
After a bit of research I decided to go with the Portkeys! Mainly for two reasons, it’s very bright in outdoor environments. Being based in South Australia means I do a lot of work in harsh conditions during summer so having a bright outdoor monitor was crucial.
I have been using this monitor either as an onboard camera monitor, gimbal monitor or a client / director monitor depending on the specific job.
Another reason I decided to buy the Portkeys was due to the fact it has bluetooth camera control. This means I can control the A7S3 on the gimbal via the monitor without needing to touch the camera! It was quiet a weird feeling the first time I did this but it’s been great to not have remote control. It also opens up options for controlling the camera in more niche projects where the camera is out of reach etc.
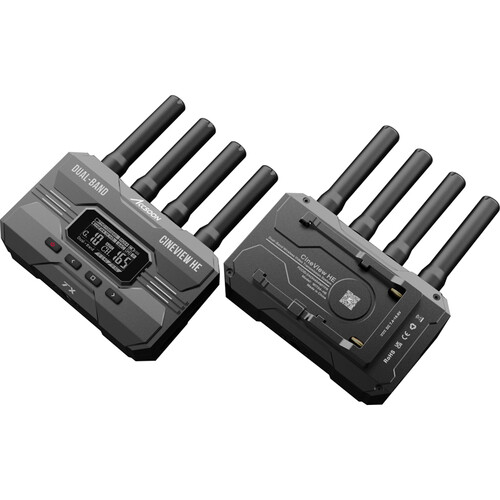
Accsoon CineView HE Wireless Transmission
For the past few years, I have been using a DIY wireless directors monitor. While this has worked very well for me, I decided to buy a setup that is a little more plug and play but also has a few more features built in to keep up with the current trends of remote producing.
Recently, I had a shoot to conduct a remote interview with the Sony FX6 in Adelaide while the producer was in Singapore. We used a laptop next to the camera for the producer to ask questions via google meet. It worked well and thats nothing new.
Using the Accsoon CineView HE Wireless Tx/Rx I had a live view from the FX6 going into the transmitter. The receiver was plugged into my SmallHD 7″ monitor via HDMI but also, using the built in USB output on the receiver I plugged it into second laptop and joined the google meet call. This enabled the producer to have two feeds from the set.
When it came to shoot b-roll, I put the transmitter onto the gimbal with the A7S3 and had a live view from the gimbal beaming up to Singapore. For comms, I called the producer via WhatsApp and wore my Airpods.
It worked a charm! A live link from the gimbal to anywhere in the world with comms to the producer sitting in their office thousands of miles away!
This transmitter / receiver unit works at up to 365m away (line of sight), has up to 4 receiving options such as tablet, phone, receiver etc.
If you’re a director, producer or client on set, I can provide a live view in 1080p HD on either the main camera, off the shoulder, tripod, gimbal or hand held.
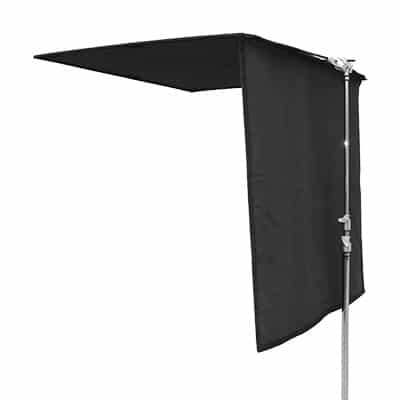
Light Modifiers
Matthews 40 x 40 floppy cutter
Some would say spending thousand of dollars of pieces of fabric isn’t the best use of budget! I am so happy these are now a part of my kit.
Being able to manipulate light, block it, diffuse it and shape it has been such a great investment.
I’m often filming interviews in offices and corporate spaces with over head spot lights and fluorescent lighting where colour balance is all over the place. Having these modifiers sitting in the production van enables me to block any overhead lights from faces, reduce light coming in from windows and also reduce sunlight by 1.5 stops when conducting interviews outside.
All of the modifiers are from the Matthews brand which I imported from the USA. Matthews equipment have been a staple on Hollywood sets for decades.
Overall, one of the most basic yet favourite purchases of my career!
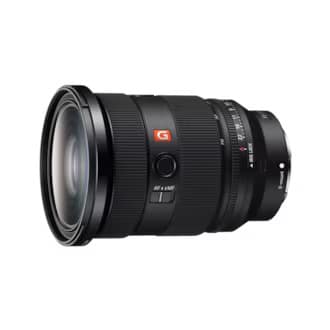
Lens
Sony 24-70 f2.8 mk2
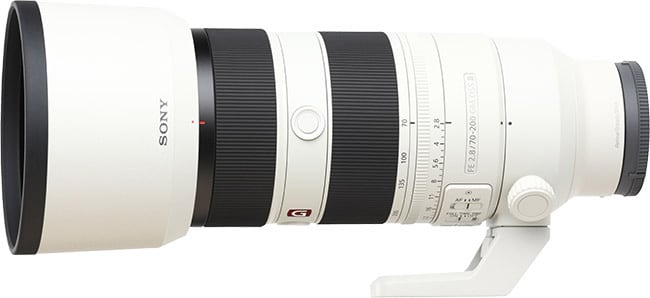
Sony 70-200mm f2.8 mk2
To round off this latest update to dop production kit, I have also invested in some nice zoom glass. Having a zoom range from 24 – 200mm at f2.8 combined with the incredible low light performance of the A7S3 and the FX6 means that low light shooting isn’t as restrictive as it once was!
One of my favourite setups when covering live events or run and gun is using the A7S3 on the gimbal with the 24-70 2.8 and using the 70-200mm on the Sony FX6 in Adelaide. Using this combination I can cover (almost) any scenario and get a wide range of different shots.
If I need to be ultra wide establishing shots, I’ll pop the 12-24mm on the FX6 which takes less than a minute.
Both of these lenses are ‘Mark 2’ from sony, they are lighter, have manual aperture rings and and super sharp even at the edges of the frame.
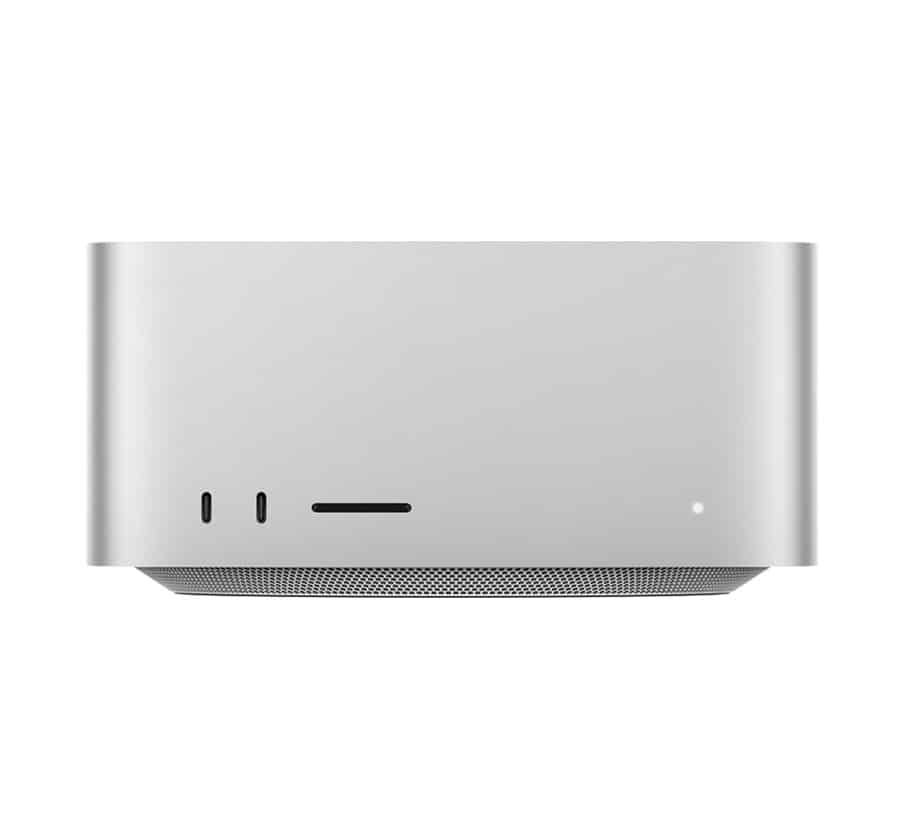
Post Production Updates
Mac Studio M1 Max
On the post production side of things, my current edit suite is a Mac Studio M1 Max.
I have been editing off this machine for close to a year now and it hasn’t skipped a beat which is what you’d expect from a mac of this spec.
I have had 3 x streams of 4k .MXF video files in a multi-cam edit perform without any buffering or issues (using an external SSD).
It’s enabled me to edit as fast and efficiently as possible. No complaints!